I put grip puppies on dry. Just wiggle them with a long thin screwdriver.
I used hairspray for years. Now i wrap a single layer of electrical tape, slosh some gas in the grip, slide em on. Overnite they dry solid.
Great success! Took some patience and small adjustments but everything came out ok. The threads holding the filter appear to be fine, and I ordered 4 bolts for that, 13 bolts for the housing, and one gasket in case I needed the crankshaft taken apart…
I was able to thread in the remaining 3 bolts into each hole. This makes me believe the threads in the crankcase cover are fine…
Great success! Took some patience and small adjustments but everything came out ok. The threads holding the filter appear to be fine, and I ordered 4 bolts for that, 13 bolts for the housing, and one gasket in case I needed the crankshaft taken apart…
I tapped it with a small punch in a counterclockwise direction. One tap and it moved a few deg. Kept at it until there was enough ‘meat’ to use some pliers. Slowly kept turning until I could get my finger on it and just unscrewed it by hand.
I tapped it with a small punch in a counterclockwise direction. One tap and it moved a few deg. Kept at it until there was enough ‘meat’ to use some pliers. Slowly kept turning until I could get my finger on it and just unscrewed it by hand.
I generally switch to stainless Allen head bolts with spring lock washers - any local fastener supply house will have them in stock. Stainless bolts are less likely to corrode and those bolts don't have enough torque to gall threads.
I generally switch to stainless Allen head bolts with spring lock washers - any local fastener supply house will have them in stock. Stainless bolts are less likely to corrode and those bolts don't have enough torque to gall threads.
Thanks. I'm considering a switch to different style bolts even though I already ordered them.
I ordered everything on a 'just in case needed' basis I won't spend much more time on the bike. I assume the new bolts would have to be slightly longer simply due to the lock washer included?
Back in '98, I was coming back from my pal's business where we watched Scotland lose on a late O.G. to Brazil, and numerous aging dads gave me the olde thumbs up at traffic lights and told me how they had one ...
So, being chronically immature and a completely irresponsible arsehole, I proceeded to do stoplight wheelies for them. It was Markham road, so I had long stretches of clear, straight road. Eventually, I left a set of lights just north of Sheppard, and looped it. Sliding down the road on my arse, watching the bike continue on one was hilarious. When it finally dropped, not so much. Amongst other things, I had to purchase a new bar so I just put Yamaha grips and a Yamaha replacement brake lever on it.
Now that you have reminded me, I should look into putting those puppies on my RZ.
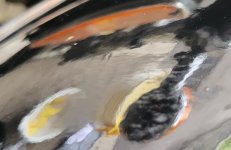
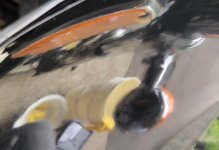
Was polishing my bike; there's still scratches at the top front. Looks ok after using a dremel and a polishing wheel with compound. I have comparison pics check the last two. one's cloudy the second is post polish.
Picked up damaged track fairings for cheap, including the resin/hardener and fibreglass cloth. Basically payed for the fibreglass materiel and got the fairings for free
Never done fibreglass before but after watching a couple videos it seems like it’s just adult paper mache
The real test will be when I crash them how well my work holds up, though I see a lot of sanding/bodywork in my future to get them looking presentable again
Picked up damaged track fairings for cheap, including the resin/hardener and fibreglass cloth. Basically payed for the fibreglass materiel and got the fairings for free
Never done fibreglass before but after watching a couple videos it seems like it’s just adult paper mache View attachment 68755 View attachment 68756 View attachment 68757
The real test will be when I crash them how well my work holds up, though I see a lot of sanding/bodywork in my future to get them looking presentable again
Too late now... use a small dollar store paint roller for smoothing out the glass. a lot easier to get out the trapped air, leaves a better finish.
And again too late: for repair use the random matt glass fibre, it won't crack as easily. If you use that stuff be sure the second layer is put on on a bias to previous layer. Makes it stronger
When you're finished sanding, apply another layer of resin as a sealer... with a roller, as thin as you can. If you're GOOD with the finish, paint it, don't sand it again... or pigment the resin with the colour you want. Resin is a lot more damage resistant than paint
I have a roller ready to go when I do the finished side of the bodywork, I’m not too concerned about the finish on the back side.
There will be another layer (or two) going on the backside for strength, one on the front get a flatter surface to work with.
The front is going to get glaze putty to even out the highs and lows, then I plan on repainting the whole set anyways. If they end up looking good from 10FT I’ll be pleased with my work
Glaze putty is not the right choice for face side for fibreglass, it’s made for very small imperfections on bondo or metal. It’s very hard to fair because it’s harder than fiberglass.
Short strand body fill is best on the paint side of fibreglass bodywork, it doesn’t absorb moisture, block sands the same as fibreglass and it doesn’t need sealing.
This site uses cookies to help personalise content, tailor your experience and to keep you logged in if you register.
By continuing to use this site, you are consenting to our use of cookies.