The garage and shed floors got painted yesterday so later today all the junk gets put in place. Next on the list is re-channeling water from under the deck. I've built a go kart wheeled, reverse trike, all terrain, low rider creeper to assist but I'm not hopeful about it actually working. But hey, I've got bragging rights to having the only go kart wheeled, reverse trike, all terrain, low rider creeper on the block.
You are using an out of date browser. It may not display this or other websites correctly.
You should upgrade or use an alternative browser.
You should upgrade or use an alternative browser.
Enough of COVID...what are you doing to the house?
- Thread starter mimico_polak
- Start date
I lay boards under the deck if I need to go under. Ideally 2x6 or wider. Wear a slippery shirt. Board along your spine and slide in. Doesnt cost much height and much nicer than pushing through dirt or gravel.The garage and shed floors got painted yesterday so later today all the junk gets put in place. Next on the list is re-channeling water from under the deck. I've built a go kart wheeled, reverse trike, all terrain, low rider creeper to assist but I'm not hopeful about it actually working. But hey, I've got bragging rights to having the only go kart wheeled, reverse trike, all terrain, low rider creeper on the block.
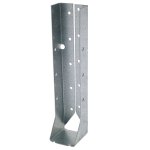
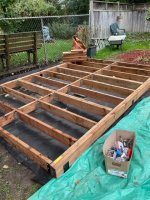
Shed base is looking good. From one end to the other I’m only out by 1/4” so I’m happy with that. I didn’t do the end joists yet as I need to find a flush/corner hanger if one exists. I’d rather have the end joists flush with the ends of the 12‘ lengths rather than inset slightly to take account of the flanges for the traditional hangers.
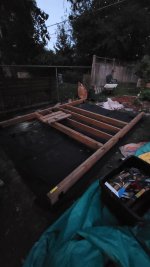

Jack shaft Gdo installed, normal gdo uninstalled to free up some space for the lift. New opener has wifi which is mostly a gimmick but you can allow amazon prime to access your garage for deliveries. Interesting but nobody is allowed in the garage as I could lose a lot more giving randoms access than whatever amazon packages porch pirates steal.
Mad Mike
Well-known member
I drop a $5er thru the space in the deck boards then send a kid under.I lay boards under the deck if I need to go under. Ideally 2x6 or wider. Wear a slippery shirt. Board along your spine and slide in. Doesnt cost much height and much nicer than pushing through dirt or gravel.
My Kids aren't quite old enough to be useful yet. Oldest helped close the pool last night.I drop a $5er thru the space in the deck boards then send a kid under.
Mad Mike
Well-known member
TIPs:Shed base is looking good. From one end to the other I’m only out by 1/4” so I’m happy with that. I didn’t do the end joists yet as I need to find a flush/corner hanger if one exists. I’d rather have the end joists flush with the ends of the 12‘ lengths rather than inset slightly to take account of the flanges for the traditional hangers.
View attachment 51594
- If your joists are not yet nailed in, you can go 24" OC with 6x6 on a floor with an 8'span as good practice is 30lb live load for a shed.
- Simple corner options (note 2 and 3 may require longer joists if your span is exactly 8'). Third option is a bit trickier but looks best of your siding doesn't cover the framing..
.

AllistonGT
Well-known member
Jack shaft Gdo installed, normal gdo uninstalled to free up some space for the lift. New opener has wifi which is mostly a gimmick but you can allow amazon prime to access your garage for deliveries. Interesting but nobody is allowed in the garage as I could lose a lot more giving randoms access than whatever amazon packages porch pirates steal.
Just curious. Why did you not just move the original opener off to one side?Makes no difference if it’s mounted to the center of the door. Could be mounted anywhere.
WiFi is great. Let’s you know when the door has been opened via your phone. Can check to see if it was left open from your sofa.
Sent from my iPhone using Tapatalk
YupTook the pool down yesterday….wow does that dead grass stink like ***….
Think next year I’ll dig up 6-8” to have a dedicated spot that’s evened out for the pool.
View attachment 51257
Ours was moldy as well and had a stench like a mofo
Sent from my Pixel 3a using Tapatalk
Really tight on volumetric space. If I've measured things properly car is going up between the brackets holding the side rails. Opener sticks out more than a foot further so wherever I put it would block a substantial portion of the lift. Two or maybe even three bikes could have worked but not a car. That is the bay I put my dd in in the winter so I didnt want to lose power open.Just curious. Why did you not just move the original opener off to one side?Makes no difference if it’s mounted to the center of the door. Could be mounted anywhere.
WiFi is great. Let’s you know when the door has been opened via your phone. Can check to see if it was left open from your sofa.
Sent from my iPhone using Tapatalk
TIPs:
- If your joists are not yet nailed in, you can go 24" OC with 6x6 on a floor with an 8'span as good practice is 30lb live load for a shed.
- Simple corner options (note 2 and 3 may require longer joists if your span is exactly 8'). Third option is a bit trickier but looks best of your siding doesn't cover the framing..
. View attachment 51602
I’ve already started nailing in. 16” on centre. I’m Ok with more rigidity rather than less. I got some black powder coated flush fit joist hangers for the edges (option 2). I got some low profile 3.8” shank 2 7/8 structural screws to fit them to the doubled up 2x6s with some high strength deck screws added and some more structural screws for the sides.
I jumped up and down on a few joists yesterday night to see if anything moved and nothing shifted. Next thing is to double check for level all around while the frame is still relatively light as my sonotube brackets can adjust front and back easily with a large wrench.
sburns
Well-known member
but you will block the view to your neighbour moai statue.Shed base is looking good. From one end to the other I’m only out by 1/4” so I’m happy with that. I didn’t do the end joists yet as I need to find a flush/corner hanger if one exists. I’d rather have the end joists flush with the ends of the 12‘ lengths rather than inset slightly to take account of the flanges for the traditional hangers.
View attachment 51594
but you will block the view to your neighbour moai statue.
thats just a bonus
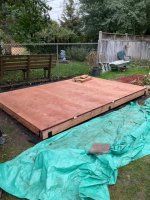
So…thinking ahead for my deck frame. I’m wondering about the plywood that’s going under the resin shed floor and sits on top of the joists. Is it worth covering that with Tyvek to help with any water that might get under the shed resin floor or should I drill a few holes in the plywood under the shed floor for drainage? Front to back there isn’t going to be much exposed plywood at all once the shed is installed but side to side there will be 2ftx8ft uncovered. For the uncovered portion I was also eventually going to put some artificial turf on it to make it look a little more at one with the garden.
Our front fence is coming along, we bought roughly 55 feet of used iron fence a few months ago with a plan to modify it to use it in our front yard. The fence was too tall (near five feet, was a pool fence). Encroachment limit is 36 inches (thanks GG!), otherwise front is 42 inches.
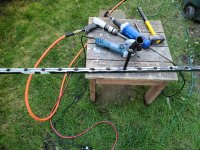
We had to break the welds that secured the bottom rail to the pickets (it was flush with the bottom). It was a real PITA, ended up using an air chisel, brute force and ignorance... the rails got pretty beat up and bent a little in the process. Once removed they needed to be cleaned up to make sure the pickets fit back trough them. The wife was going to do all this part but she was not comfortable with the air and power tools, but it was good for her to see it is not all that easy....
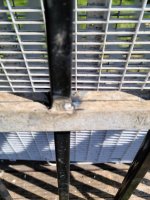
Then I needed to insert the pickets through the rail, I want the pickets to extend past the rail at the bottom for looks and for possible city forced modification. Each section is now 41 inches tall and the pickets extend 5 inches past the rail. I like the look but if the city comes along and makes us drop the fence to 36 inches we can, I will just cut the extend pickets flush with the bottom rail and drop the sections down (41 becomes 36)....
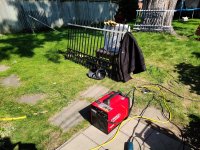
The fence is hot galvanized. I do not have the "required" respirator so I used a box fan (blowing away from the work area) as a poorman's welding vent hood (preventing welding fume fever), welded on breezy days as well, also applied some previously learned welding breathing techniques... I made a jig out of a 2X4 and also used a woodworking bar clamp to align the rail and straighten them out as I went along. FCAW with a 140 amp Lincoln (see they do work!).. Not the prettiest welds but they are at the bottom of the fence.... and FCAW on galvanized, if there is slag you drag...
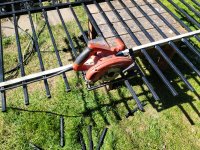
The five inches of pickets through the bottom rail was decided because that was the distance between the blade and side of my trusty Hilti circular saw, and it looked good.... I welded along one side, used the flat unwelded side of the bottom rail as a guide and to cut all the pickets to the same length.... then welded that side. Went through two blades and started on a third, this blade was pretty much done....
Paint won't stick directly to galvanized, I powerwashed each section to blow any loose/flaking paint/powder coat off, wire wheeled the heavily oxidized areas and any other loose stuff. Treated them with vinegar to neutralize the remaining oxidized zinc and then applied a primer intended for galvanized on any bare spots (shown section is upside down).
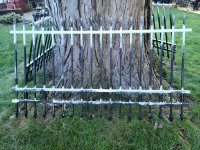
I was originally going to do make the section 36 inches but we did not like the look. I made a couple of test pieces from small sections first.
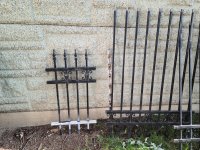
What we started with....
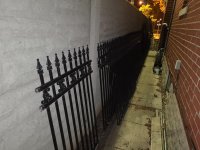
Painting the sections now (well not today in the rain), hopefully installing in the next couple of weeks.
edit...
PSA/pro tip....having the spouse involved in the hard work is a good reality check and reduces the "why isn't is done yet".... I highly recommend this.
We had to break the welds that secured the bottom rail to the pickets (it was flush with the bottom). It was a real PITA, ended up using an air chisel, brute force and ignorance... the rails got pretty beat up and bent a little in the process. Once removed they needed to be cleaned up to make sure the pickets fit back trough them. The wife was going to do all this part but she was not comfortable with the air and power tools, but it was good for her to see it is not all that easy....

Then I needed to insert the pickets through the rail, I want the pickets to extend past the rail at the bottom for looks and for possible city forced modification. Each section is now 41 inches tall and the pickets extend 5 inches past the rail. I like the look but if the city comes along and makes us drop the fence to 36 inches we can, I will just cut the extend pickets flush with the bottom rail and drop the sections down (41 becomes 36)....

The fence is hot galvanized. I do not have the "required" respirator so I used a box fan (blowing away from the work area) as a poorman's welding vent hood (preventing welding fume fever), welded on breezy days as well, also applied some previously learned welding breathing techniques... I made a jig out of a 2X4 and also used a woodworking bar clamp to align the rail and straighten them out as I went along. FCAW with a 140 amp Lincoln (see they do work!).. Not the prettiest welds but they are at the bottom of the fence.... and FCAW on galvanized, if there is slag you drag...

The five inches of pickets through the bottom rail was decided because that was the distance between the blade and side of my trusty Hilti circular saw, and it looked good.... I welded along one side, used the flat unwelded side of the bottom rail as a guide and to cut all the pickets to the same length.... then welded that side. Went through two blades and started on a third, this blade was pretty much done....

Paint won't stick directly to galvanized, I powerwashed each section to blow any loose/flaking paint/powder coat off, wire wheeled the heavily oxidized areas and any other loose stuff. Treated them with vinegar to neutralize the remaining oxidized zinc and then applied a primer intended for galvanized on any bare spots (shown section is upside down).

I was originally going to do make the section 36 inches but we did not like the look. I made a couple of test pieces from small sections first.

What we started with....

Painting the sections now (well not today in the rain), hopefully installing in the next couple of weeks.
edit...
PSA/pro tip....having the spouse involved in the hard work is a good reality check and reduces the "why isn't is done yet".... I highly recommend this.
Last edited:
nice looking shed pad, you could land a helicopter on that thing


