Sprocket and Chain Questions

get some stainless steel allen head cap scres, and replace them all with those, Canadian Tire will have them in black not stainless, and they are where the home hardware stuff is, not the automotive section, look for metric nuts and bolts....

if you have a Brafasco nearby go see them, they will have the stainless steel ones.

I needed these, yours might be the same, but measure and check

good call, went to crappy and found what I needed, but it was an m5 x08 or something like that. Fit perfect tho with a socket head so no more strippin that ******, lol. Diaphrams springs and needles out. However theres some sort of plug that sits on the end of the carbs that requires some sort of super special tool to remove, once I cool down Ill go outside for photo, Im just worried about submerging this piece in the pine sol, but since its on the end i can place it on top so it doesnt end up in the solution. The dance continues....... :)
63f2e722-4459-08c2.jpg
63f2e722-446d-e686.jpg
what takes that screw off?
 
Last edited:
DON'T TAKE APART WHAT YOU DON'T HAVE TO

That assembly on the end is the throttle position sensor, which the bike's computer (it has one, even though it is carb not EFI) uses to set the correct ignition timing.

It has a security fastener on it because you are not supposed to remove it.

This is once again reason for NOT dipping the entire carb set in any sort of solvent. Address the individual problems with the slow jets and pilot circuit - DON'T try to do it by dipping the entire set of carbs in solvent. For one thing, you can damage sensitive parts such as that sensor. For another ... it probably will NOT solve your clogged pilot/idle circuit anyway.

Take the slow jets out and take the idle mixture screws out as previously advised and do NOT try to dip the entire carbs in any sort of solvent and do NOT tamper with that tamper-proof screw.
 
Will not be touching that sensor, hey Brian, where the hell was u when I was growing up, coulda kept me outta tons of trouble, lmao :) I got real lucky wit the stripped screw, I forgot I bought a grabit from crappy, yanked those bad boys quicker than a hillbilly tooth XD

Cleaned up as much as I could with carb cleaner, put the jets into some carb cleaner to sit till tomm gots to go get the wife
63f2e722-6011-4ce2.jpg
63f2e722-6039-d221.jpg
 
Last edited:
I see the main jets in your little solvent bottle. I don't see the pilot jets ...
 
What do they look like? I only removed what I could get a hold of with a flathead or a socket. There are parts I left within the body of the carbs I'll take pic when I get home I'm sitting in front of the go station
Ok I'm here, can u tell with pics what I haven't removed as of yet? Here's a pic of what was in the bottle....
63f2e722-6b5a-6765.jpg

Can u tell with these what I am missing?
63f2e722-6b9b-f67e.jpg
63f2e722-6bbe-4d1a.jpg
63f2e722-6be4-cfdf.jpg
 
Last edited:
OK, you got them. In the first photo in the above post, the pilot / slow jets are the leftmost jets. Take a look through the end and find out if you can see through the hole. The fuel metering hole is very small but you should still be able to see through it and see if there is any build-up inside it.
 
I put an LED to em, the carb cleaner cleaned it pretty good, saw perfect circle, but the jet kit replaces some of these parts, no?
 
Ok, jet kit hasn't come in yet, so I decided to get my valve clearance inspection started, so I bopped over to RD and got me a feeler gauge and went to town. Here's the numbers I got, the blanks in cylinder 2 and 4 are because my lowest feeler (0.05mm) would not fit. Here's my ranges - exhaust 0.22 to 0.31mm, intake 0.11 to 0.19mm, how should I deal with the blanks? My guage is in intervals of 0.05, is there one for individual measurements?
63f2e722-a7f7-0b1a.jpg
 
Shims are normally only available in 0.05mm increments anyway. You've got some tight valves there, my friend. Next step is to remove the timing chain tensioner (and make sure you understand how to re-install it properly - it needs to be held back from extending until the mounting bolts are snug) and take out the camshafts. Follow the instructions in the factory service manual to the letter. Since you can't measure the valves that have less clearance than your thinnest feeler gauge, you are going to have some trial and error with regards to selecting which shims to install in those positions. Get used to it ...
 
By the way, it is entirely possible that all of your rough idling issues were related to too-tight valve clearance, rather than carbs.
 
Oh well, so it's better I just buy a shim kit than and fiddle around as opposed to a swap? 'Sides idk where to swap shims, that was gonna be one of my next questions. Is having clearances that tight a "normal" thing?

I've already taken off the chain tensioner and the cover for the cams. Let me tell u how effin fun that was. The POS feeler guage, purchased friggin today, has this nut that pops loose and oops, down she goes into the engine, had my magnet wand for just such a special occasion, but wouldn't ya effin know it the s**ts made of plastic! took the whole thing apart, torqued it back all nice and took all my measurements again just to be sure.

I knew about the chain tensioner bit from a YouTube vid from a dude named Wedginator, pretty sure he's Canadian his garage is stocked full of moto master stuff and he was working on an engine similar to mine so it helped a bit. I read up the service manual pretty good, I've had it since I got the bike three years ago, I was just slowly trying build up enough courage to start doin this stuff on my own. So far I've used only one band aid from my first aid kit so I gotta say 1 point for me. I found a shim kit for my bike on the net for 71 bucks, I'm not gonna take it tho if this guy ships ups or FedEx, but it gives me time to relax and contemplate the meaning of life, or drink, I haven't decided yet :) finally, the friggin Go trains here 23 minutes late :(
 
First step is to take the cams out (take note of which cam cap goes where, don't mix them up or install them the wrong way 'round!) then take the lifters out (I like to keep track of these so that they all go back in their original holes) and find out what shims you have where, then figure out what shim each valve needs. It might be possible to swap some of the shims around within the engine so that you only have to get fewer shims.
 
First step is to take the cams out (take note of which cam cap goes where, don't mix them up or install them the wrong way 'round!) then take the lifters out (I like to keep track of these so that they all go back in their original holes) and find out what shims you have where, then figure out what shim each valve needs. It might be possible to swap some of the shims around within the engine so that you only have to get fewer shims.

Good call on the shim swap. I swung by Snow City and Jeremy hooked me up with a couple of what I needed, sadly he didnt have all of them but Sandy ordered them up for me so they should be there by mon/tues. Also figured out my issue with getting proper clearance measurements (I was doin it wrong, absolutely shocked, let me tell you, lol:P)Turns out my intake was smack in the middle of spec and my exhaust was completely jacked so I have to replace all 8 shims, Jeremy hooked me up with three and gots five on the way :) Picked up the jet kit and have almost completed putting them in. Just a question tho, the manual wants me to muck about with the mixture screw. It says to turn back and bring it out 3 turns, but other people are saying 1 1/2 turns is enough, which is correct?
 
Last edited:
Great, a new problem, seems I got a jet kit for an 02 zx6r, which is the same engine, but on dynojet website theres a kit for the zzr with different main jet numbers(dj118 and dj120 for zx6r, dj122 and dj124 for the zzr) is this a big deal? The parts fit but I want to find out what to do before I turn the bike over, which is still a few days from. Ow but I want to deal with this problem so I can fugedabowdit. Any thoughts?

Edit, piecing together what i could off the net, it seems that I can use the bits from the 02 kit for my zzr, where the changes were made with the 07 kit was allegedly for emission rule changes after 06, but idk how much truth there is to that, so im gonna call them on Monday and see if I can get a straight answer. I have a guy online who swears he has the same bike with literally all the same mods I got all ordered for the 02 zx6r. So here's hoping it works cuz I dont see anywhere you can buy dynojet bits by themselves without buying a kit :)
 
Last edited:
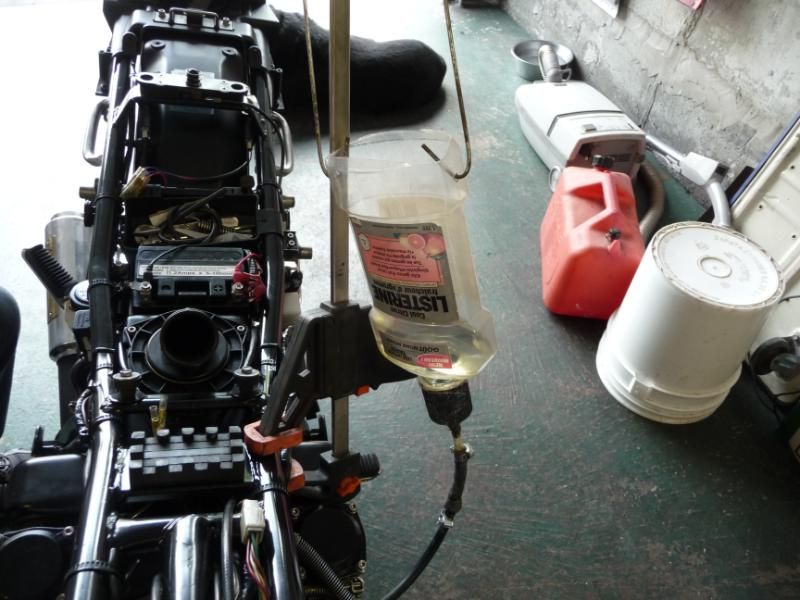
Ok so I installed a different set of jets and got everything back together, can anyone give me some suggestions on how to rig up some sort of aux fuel tank on the cheap?
 
something like this

P1080996.jpg


or get a tank from a lawnmower, grass trimmer, snowblower, etc....

Lmao! That's some gangsta s**t right thurr! Luv the listerine bottle! I found a 1 little funnel from princess auto and a couple of connections from home depot(idk the real name of the brass fittings for the hose) and some clear tube. Leaked like a beeyotch until I taped up the connections tight.

63f2e722-e5bc-1e47.jpg


But for some even better news, I got her up and running about an hour ago! She sounds like a friggin beast and pounces like a cheetah! Gotta thank peeps for taking time out to walk me thru it...and gotta give a huge big ups to Brian P for coming thru da most.......u ever need a body buried dude, I'll bring a shovel, ;)
 
It bounces from lets say if I can get it to the 1300 it flutters between there and 1500. I just took it for a quick boot around the block without earplugs so I could better hear the issues. At speed everything seems normal to me, but once I stop for red light or traffic the rpms get wobbily again and Im there quickly trying to mess wit the idle screw. Ive had the bike for three years and the carbs have not been cleaned since Ive had it. I guess that would be my next move? I store the bike indoors with stabilizer in the tank, this winter past tho I think I may have gotten the mix wrong cuz my bike was really acting goofy until I burned thru that winter tank. Hey Ive heard that carbs can be dropped in a solution of pine sol and water for a good clean, but what parts do I have to remove before placing in the pine sol? What is the mixture to water and how long do they need to be submerged? Sorry I got tons of questions but now u knowledgable buggers got me going, lol :)

try seafoam for cleaning your carbs
 
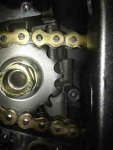
Ok, so I've had the new front and rear sprockets on with the chain for a bit of time now, I found that there was a high pitched whining coming from the chain whenever a load was put on it. I believe I've tracked it down to the front sprocket, I took off the cover to inspect it, the roller from the chain enters the sprocket with an audible knock. I double, triple and quadruple checked the slack adjustment and it's perfect. I guess my question is should I be getting rid of new front sprocket and replacing with a newer one? Maybe a renthal or something(sprocket doesn't have a name brand, only that I got it from sprocketcenter.com, which is what it says on the packaging. Rear sprocket is from Superlite sprockets, no noise from that side of the chain tho) can anyone tell me if my front I wearing as it should be?ImageUploadedByTapatalk1344271172.374942.jpg
 
Back
Top Bottom