Yes. Daughter's bike is trials also. Royal Dist chock on 1"plywood looks good.3.5 inches is really narrow. Is your daughter's bike also a trials bike? I'd use that chock for those applications, but I'd add a pin or something through the deck just to make sure the whole thing couldn't back out of the keyhole slots going over a big bump.
Royal Distributing's basic dirt bike chock comes with quick detach plates. I have this one and it works fine, although when I bought it the quick-detach plates were extra, I think. I also have this one, which works better with street bike brake rotors. I bolt mine through the deck with T-nuts so they're still pretty quick to install and uninstall
You are using an out of date browser. It may not display this or other websites correctly.
You should upgrade or use an alternative browser.
You should upgrade or use an alternative browser.
Enclosed trailer hacks
- Thread starter Wingboy
- Start date
The Harbor Freight folding trailer is VERY popular in the USA.Slightly off topic…would it be worth to make my 4x8 a covered trailer? Not looking for much camping or anything but think it would be a good hack for those times when needed.
Might really screw with ability to tow by Volt, but wouldn’t be carrying more than one bike as 2 would force the handlebars to pop out of the frame.
When I bought mine and my OCD side of me was begging to improve it, I can across many different sites/forums on how to modify if.
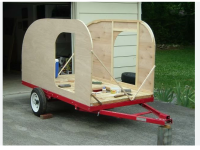
Tons of Americans use the trailer as a base for a teardrop trailer and travel the country with them.
Good friend of mine makes trailers for reasonable prices. Made in Canada, family business doing it for years and they ride too.
Have a look.
ps. They can tell you the differences between a cheap trailer and what they do and even see their shop. Give them a call and speak to Steve or Barb or maybe one of their kids will answer?

 highlandtrailers.com
Have a look.
ps. They can tell you the differences between a cheap trailer and what they do and even see their shop. Give them a call and speak to Steve or Barb or maybe one of their kids will answer?

Highland Trailers
 highlandtrailers.com
I have these chocks quick release from the floor.https://www.amazon.ca/Lock-Load-BK500-Orange-Black/dp/B07DKPHRPQ/ref=mp_s_a_1_5?crid=OVEQX69YO871&keywords=lock+and+load&qid=1678664038&sprefix=lock+and+load%2Caps%2C331&sr=8-5Trailer isn't here yet.I want to be ready with a few things. Wheel chocks. Most of the time just my trials bike. Sometimes my daughter's bike. And occasionally a pit bike for my girlfriend. So a chock that can be moved makes sense. Right?
Any comments, thoughts, criticisms, praises, trash talk etc?
Pit Posse 11018BK (3 1/2" Wide) - Easy-to-Install - Motorcycle Universal Removable Wheel Chock - 5 Year Warranty - Motorcycle Accessories-Black, Accessories - Amazon Canada
Pit Posse 11018BK (3 1/2" Wide) - Easy-to-Install - Motorcycle Universal Removable Wheel Chock - 5 Year Warranty - Motorcycle Accessories-Black in Accessories.www.amazon.ca
Sent from the future
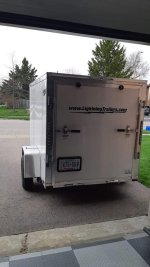
Still sitting here has worked great when needed.I had a highland trailer , excellent product
Sent from the future
ifiddles
Well-known member
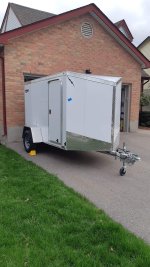
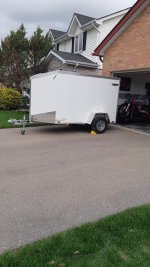
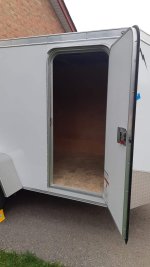
What model is that?Got this mid-last year for not much more than that. Holds 2 bikes very well and has some very nice amenities. But your RAV4 may struggle a bit with it….

BigEvilDoer
Well-known member
Not so sure about this...Not enough room in there for it. Girlfriend loves parking in there on weekends.
You're concerned about security - inside your garage is likely the best place to be.
Doesn't make sense to lower security for a night or 2 a week - at least it doesn't make sense to me.
It's a 22rr, 2022 model.What model is that?
Sent from my Pixel 7 using Tapatalk
3/4 4x8 poplar plywood will weigh 70lbs, 1'' 4x8 poplar about 92 lbs, thats managable .
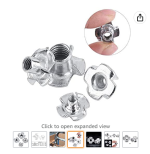
my thing was install the T nuts backwards , drill hole and hammer the T nut into the top side of sheet, take a carriage bolt ( the ones with the smooth head and with an angle grinder make a slot in the head so you can screw it into the T not coming up from the bottom , you now have a stud you mount the chocks on. The bolt is now smooth underniegth so you can slide the plywood in and out and since the bolts are never coming out who cares how ugly the ground slot is.
plywood is slippery when muddy or wet, stop at home depot and grab a sheet of galvanized ceramic tile expanded metal lath , its about 3x8 and staple gun the **** out of it, now your bed is non slip for trials bikes.
Plan B is blue plastic water barrel with a hose bib drilled and mounted on the bottom side for gravity feed water pressure, smallest gas pressure washer you can find, boom , bikes are clean for the ride home.
Thoughts on these? Rather not cut holes in the floor,but it's super simple.I pick up my trailer on monday.
I like that they're flush when not needed. I don't love the product design and the booger welds in their marketing don't give me the warm and fuzzies. Can't see from the pics if they put a drain in or not. Standing water in steel does not end well. Easy enough to fix but back to marginal design.Thoughts on these? Rather not cut holes in the floor,but it's super simple.I pick up my trailer on monday.
These would be quite handy, but I share @GreyGhost concern about water and longevity.Thoughts on these? Rather not cut holes in the floor,but it's super simple.I pick up my trailer on monday.
I wouldn’t mind one on my trailer as I have to install the chock a few times per year.
When I take more than one bike I remove my chock, move it to position #2 and the second bike chock goes to position #3.
Mad Mike
Well-known member
I did a few things to my 6x12v when I received it.
1. Wiring. Conduit added to protect for all inside wires. 120vac inside outlet and gennie hookup thru V.
2. Tjedowns. Added 2 rows of Erickson track to the floor plus 6 flush tiedowns. Had 2 chocks - removed them -- always in the way and not really needed.
3. PA 12V electric jack (regularly go on sale for $/60.).
4. Vevor 5KW diesel heater inside the Vee.
Probably the most important thing you can do is protect your trailer from rust. Get the underside steel rustproofed, seal the tongue/hitch frame, door steel frames and ducktail with epoxy primer.
Good tips. I bought aluminum.I did a few things to my 6x12v when I received it.
1. Wiring. Conduit added to protect for all inside wires. 120vac inside outlet and gennie hookup thru V.
2. Tjedowns. Added 2 rows of Erickson track to the floor plus 6 flush tiedowns. Had 2 chocks - removed them -- always in the way and not really needed.
3. PA 12V electric jack (regularly go on sale for $/60.).
4. Vevor 5KW diesel heater inside the Vee.
Probably the most important thing you can do is protect your trailer from rust. Get the underside steel rustproofed, seal the tongue/hitch frame, door steel frames and ducktail with epoxy primer.
Mad Mike
Well-known member
When I refo min inside, ill use white hdpe panels.I would do the interior with Banova or a light ply like poplar lite or okume light . Keeps weight out of the trailer and looks pretty .
Sent from my iPhone using GTAMotorcycle.com
Mad Mike
Well-known member
I had an Aluminim frame prior to this one... never again. The trailer frame was aluminum, an ov voursectge skins too. The interior framing on mine was steel, galvanic corrosion ate away all the structure around the doors inside 5 years. I had to strip the interior to patch up rusted our upright framing.Good tips. I bought aluminum.
Thoughts on these? Rather not cut holes in the floor,but it's super simple.I pick up my trailer on monday.
I use this if i'm not using TRS.
On sale also.
Very happy today.


