You are using an out of date browser. It may not display this or other websites correctly.
You should upgrade or use an alternative browser.
You should upgrade or use an alternative browser.
FZR400 winter overhaul
- Thread starter Brian P
- Start date
Wow. That looks sweet!
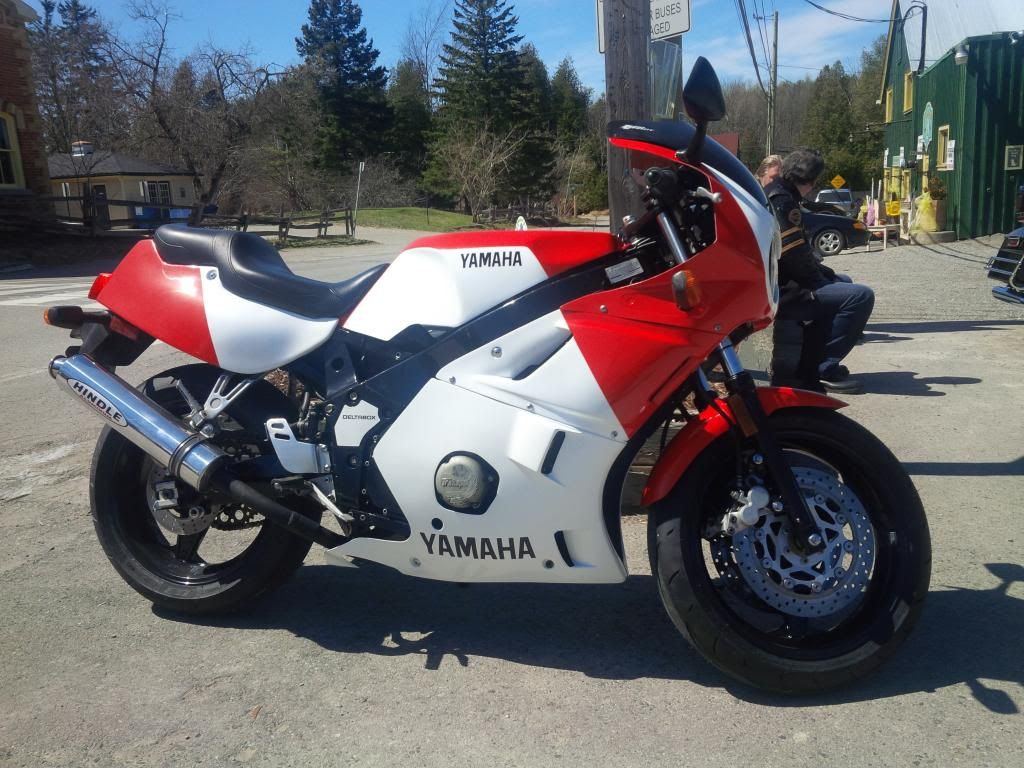
It looks better in person than in the photo. Either my camera or my computer monitor is giving the red a peachy tone to it which is not really there. I do believe that the target has been hit squarely in the middle!
theraymondguy
Well-known member
I am way late to the game, but FYI I've got lots of 7mm copper core wire on a roll. Great build, it's looking slick!
Nope. Wheels should be done next week, then I have to get new tires and re-assemble them. Still need stickers, too. So it looks exactly the same as in the last pics ... I haven't touched it aside from getting the wheel project moving.
I know it's only half an hour of work (after I get the wheels and tires) but I just finished shoveling half of the driveway. That is not a motivating factor ... that is a depressing factor.
I know it's only half an hour of work (after I get the wheels and tires) but I just finished shoveling half of the driveway. That is not a motivating factor ... that is a depressing factor.
Great build, inspiring stuff! Makes me want to buy an old race bike and do an overhaul myself. I haven't worked on engines at all yet, but I'm hoping to learn.
I can hook ya up with a FZR racebike
Stickers came in and are on the bike (from http://www.alteredimagegraphix.com/ ), I want the next pictures to be from outside the workshop. There's one more assembly chore to do (wheels and tires), but there's one more FedEx shipment that has to show up before I can do that.
rzresurection
Well-known member
Very top notch work on all accounts. I really love the Marlboro paint scheme. It has 80's GP written all over it. You need to remove 2 extra strokes to make authentic. Lol.

Looking great buddy!

Looking great buddy!
Details, details.
Today's discovery was that a Dunlop Q3 160/60-17 DOT tire is wider than a Bridgestone 165/630-17 slick, and the Deltabox swingarm (this bike) is narrower towards the front than the old fabricated-extrusion swingarm (race bike). Once guided into place, the tire clears the chain and the swingarm by millimeters which is OK, but it hits the brake torque arm, and forget about the chain guard - no chance. Getting the tire into place was a chore ... but not helping matters is that with new (different) sprocket sizes, the chain is just barely long enough.
I fixed the brake torque-arm situation for the moment by re-mounting it differently, on the outside of the tabs instead of centered on the tabs. I don't use the rear brake when riding, and the torque arm is under compression in this application, so the fact that the bolts are now in single-shear instead of double-shear shouldn't be an issue in the real world.
And with this ... the bike was on its wheels and capable of moving around for the first time in months. It felt like it was sitting very high. Quick front sag measurement gave only 22mm. Although the combined length of the fork springs and spacers was made the same as stock, these springs have a higher initial spring rate, so this wasn't really surprising. I hoisted the bike back off the ground and took 10mm off the length of the preload spacers, which should put front rider-aboard sag where I want it. I know the rear shock is longer than stock (even with the ride height set to the lowest setting) but I'll hold off adjusting that until I can have a test ride.
I need a new longer chain; after that it should be ready to run.


