mbroyda
Well-known member
finally drywalled the garage / work shop i built 2 years ago, followed by paint and an epoxy floor
It actually looks good when varnished.
Sent from my Pixel 3a using Tapatalk
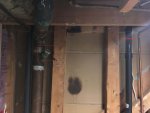
Is that copper drain stack? Baller.Finally been able to tackle the plumbing project, after dealing with painting, which is still ongoing...
Rip open the walls.
View attachment 43030
That capped Wye joint will become useful to divert the upstairs sink into the main stack
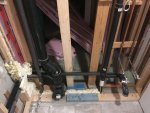
View attachment 43031
The downstairs sink it not being vented.
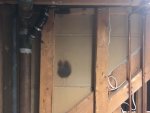
View attachment 43032
I was able to cut off the cap and found a fitting to make it work. Re diverted upstairs bathroom sink
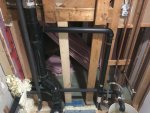
View attachment 43033
Added a vent to the downstairs bathroom sink to the main stack.
What is not seen is the re-arranging of the feeds, there was all this weird directional stuff going on, which caused some pipe banging when the water was run. I removed it all, and made them straight with "T's" and tucked the feeds up into the joists.
Thanks all for the info on the wet venting, Terry's plumbing etc.
I found this link which was also very helpful with visuals as well.
Now to put it back together!
It could be, I live in a old 60's bungalo. When I first moved here there was a hidden 10' ft metal (or copper) pipe hidden in the back wall. It looked to be going out to a non existent septic tank. It was left in place with the ends cut off.Is that copper drain stack? Baller.

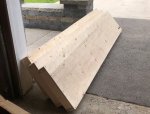
I'm considering adding some carriage bolts...just in case. It's only held together by 3" wood screws. Many many screws....but still just screws.I see you follow same theory as me
The stronger the better
you can take a tank through some of my builds and it won’t budge
How much weight do you think you will put on this shelf? Next time just use nails but I wouldnt be concerned. My garage came with a 10'x10' platform suspended on one corner by five deck screws. I dont trust that and mostly use it for kids off-season crap but who knows what previous owners piled up there and it hasn't failed yet.I'm considering adding some carriage bolts...just in case. It's only held together by 3" wood screws. Many many screws....but still just screws.
Also may add some bracing in b/w the shelves so there's something there as additional support.
Don’t bother. Don’t waste your time and money.I'm considering adding some carriage bolts...just in case. It's only held together by 3" wood screws. Many many screws....but still just screws.
Also may add some bracing in b/w the shelves so there's something there as additional support.
Next time just use nails but I wouldnt be concerned.
Screws just give no warning. They are either perfect or you are crushed. Nails slip and bend to warn you things are not going well.Manually hammering nails would be a PITA. I know our grandfathers used to do it but today, unless you have an automated gun (air or battery) I prefer screws.
I do have a pneumatic framing gun but I still like to use screws for projects like this just in case you need to modify in the future.
Screws are much easier to take out than nails, which would require you to saw them off.
I made a work bench in the garage when we moved in and now I have a different idea for it and need to dismantle it. Screws will make this easier to accomplish.
Sheer.Screws just give no warning. They are either perfect or you are crushed. Nails slip and bend to warn you things are not going well.
Sheer.
Screws shouldn't be used where there is sideways pressure on a fastener. Eg. joist hangers with screws is real bad. Like you said, they don't bend. They just snap.
Sent from my SM-G903W using Tapatalk

