Suzuki Marauder Rebuild - (VZ800) | GTAMotorcycle.com

Suzuki Marauder Rebuild - (VZ800)

I am assuming this wasn't a writeoff? It would suck to put the time and money in and end up with something that had to be sold out of province.
 
Headlamp Build

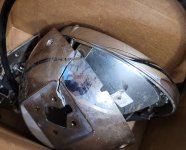
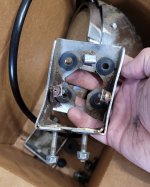
Old headlamp isn't doing too hot. The options are OEM replacement from a parts bike, fitting in a aftermarket 7" lamp holder, or full DIY.

20240918_135546.jpg
20240918_135516.jpg

I wanted to try my hand at fabricating as much as I could out of parts I had around me. The cyberpunk aesthetic pushed me toward something LED based, and angular. I also wanted a wider beam pattern, but still narrow in height. Original lamp focused light within about 10° vertically, so I wanted to keep within that.

I had a pair of Alpena Tecslim 7" light bars that I was planning on using as fog lights on my car. I measured my front bumper incorrectly so they were just gathering dust in my closet. The mounting hardware included didn't fit the application.

First step was to make a set of brackets or clamps that would allow me to mount two light bars to the front, securely, and adjustable. I also bought aftermarket turn signals since the OEM ones on the back ripped off. I needed to incorporate them into my solution as well.

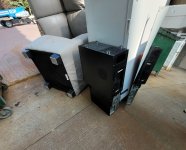
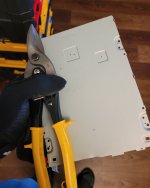
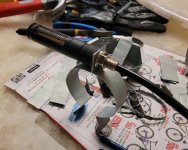
In the spirit of DIY, a trip to the building dumpster yielded access to soft sheet metal that I could cut with snips and maybe shape with a set of files.

20240918_134727.jpg
20240918_134945.jpg

Turn signals ordered from here (AliExpress link).

20240821_185007.jpg

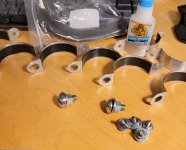
I glued thin rubber shims to the underside of the clamps to help them stay in place. I tested them out without the strip and they stayed in place fine, but all the same.

On the front of the clamps, I went with 6mm holes to match the M6 bolts from the original light bar hardware kit. On the back end, a 10mm hole to match the M10 turn signals. All clamps were drilled the same, not sure why. Should have thought this through because now I needed larger bolts for the bottom clamps where there are no turn signals at the back.

20240905_212822.jpg

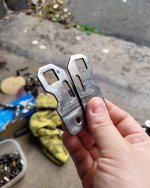
To retain vertically positioning, I reused the L mounting brackets that came with the lights. Heat with propane and hammer flat.

20240827_185353.jpg

I needed a strip to run, on each side, between the top and bottom light bars, to keep them from vibrating excessively, and make the whole fixture more rigid.

Flat washers were used to center the light bars between the clamps, adding a couple mm of offset. I also needed to space the bottom clamps apart more than expected. All clamps were sized for the 54mm section of the forks, but after alignment and leaving space for the speedometer and other cables, I had to move the bottom clamps down to the 56mm section.

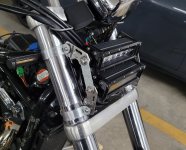
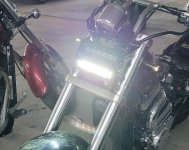
The final look ended up like this.

20240918_134618.jpg

Still adjusting cable management on the back end, may need to shorten some excessively long wires. I split the old bulb harness with bullet connectors, so it's easy to return all modifications to stock.

Bottom light wired to low beam circuit, top light wired to high beam. Consumption of both lights combined is well below the most the circuit would see from the original bulb.

20240918_144925.jpg

Better pictures will follow. (Parts bike in the background).
 
Last edited:
I am assuming this wasn't a writeoff? It would suck to put the time and money in and end up with something that had to be sold out of province.
Since I was able to ride it back, no other entity knows about the mishap 😅...

Not a write-off, and still technically safetied.
 
Headlamp Rebuild

Old headlamp isn't doing too hot. The options are OEM replacement from a parts bike, fitting in a aftermarket 7" lamp holder, or full DIY.

View attachment 69783
View attachment 69784

I wanted to try my hand at fabricating as much as I could out of parts I had around me. The cyberpunk aesthetic pushed me toward something LED based, and angular. I also wanted a wider beam pattern, but still narrow in height. Original lamp focused light within about 10° vertically, so I wanted to keep within that.

I had a pair of Alpena Tecslim 7" light bars that I was planning on using as fog lights on my car. I measured my front bumper incorrectly so they were just gathering dust in my closet. The mounting hardware included didn't fit the application.

First step was to make a set of brackets or clamps that would allow me to mount two light bars to the front, securely, and adjustable. I also bought aftermarket turn signals since the OEM ones on the back ripped off. I needed to incorporate them into my solution as well.

In the spirit of DIY, a trip to the building dumpster yielded access to soft sheet metal that I could cut with snips and maybe shape with a set of files.

View attachment 69786
View attachment 69788

Turn signals ordered from here (AliExpress link).

View attachment 69789

I glued thin rubber shims to the underside of the clamps to help them stay in place. I tested them out without the strip and they stayed in place fine, but all the same.

On the front of the clamps, I went with 6mm holes to match the M6 bolts from the original light bar hardware kit. On the back end, a 10mm hole to match the M10 turn signals. All clamps were drilled the same, not sure why. Should have thought this through because now I needed larger bolts for the bottom clamps where there are no turn signals at the back.

View attachment 69787

To retain vertically positioning, I reused the L mounting brackets that came with the lights. Heat with propane and hammer flat.

View attachment 69790

I needed a strip to run, on each side, between the top and bottom light bars, to keep them from vibrating excessively, and make the whole fixture more rigid.

Flat washers were used to center the light bars between the clamps, adding a couple mm of offset. I also needed to space the bottom clamps apart more than expected. All clamps were sized for the 54mm section of the forks, but after alignment and leaving space for the speedometer and other cables, I had to move the bottom clamps down to the 56mm section.

The final look ended up like this.

View attachment 69792

Still adjusting cable management on the back end, may need to shorten some excessively long wires. I split the old bulb harness with bullet connectors, so it's easy to return all modifications to stock.

Bottom light wired to low beam circuit, top light wired to high beam. Consumption of both lights combined is well below the most the circuit would see from the original bulb.

View attachment 69794

Better pictures will follow. (Parts bike in the background).
Those look interesting but how is the beam? Shoot a pic of them hitting a garage door or wall. Are you planning on riding this in the dark or daytime only?
 
Those look interesting but how is the beam? Shoot a pic of them hitting a garage door or wall. Are you planning on riding this in the dark or daytime only?
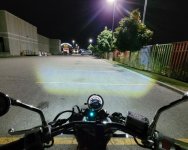
Will take a night time pic this evening after the Burger meet.

I have used them on a trip to Collingwood this past weekend and the forward throw was acceptable, the lateral throw was a bit bonkers (vary wide). May need to look into a way to refocus the last LED or two on either end.

The vertically pattern is listed as 15° which sounds a bit much, but in practice it was ok. You'll see soon.
 
@GreyGhost

Hope this helps, not the best shots. In real life, the contrast between the lit and unlit area is not as dramatic. This is about 20' from a wall.

20240918_212908.jpg

This is closer to what I see. Used a location with a street lamp so it closer matches a road.

20240918_212946.jpg
 

Back
Top Bottom